Create a PDF from Images: With a Custom Front Page and Comment Pages
Photos for a client, a portfolio for a job application, the pictures from a site inspection: many images often need to go out as one single, neatly designed document. The KodiniTools batch editor exports your image series directly as a PDF. With the built-in PDF designer you can add your own front page and as many comment pages as you need, with texts and images. No installation, no sign-up, no upload.
What the PDF export can do
| Area | What you can set |
|---|---|
| Images | All images or only the selected ones, one image per A4 page |
| Document | Document title, author (optional), portrait or landscape |
| Title page | Automatic title page with title, image count and date |
| Custom front page | Free designer with texts and images, replaces the automatic title page |
| Comment pages | One or more pages with texts and images, e.g. for notes or descriptions |
| File names | Optionally below each image |
| File size | Optional optimization with stronger JPEG compression |
Step by step: export images as a PDF
-
Open the image series editor
Go to kodinitools.com/bilderseriebearbeiten — free, no sign-up.
-
Load images
Load files via drag & drop, “Select Files” or “Select Folder”. To export only some of them, select the images you want in the gallery.
-
Start the PDF export
In the status bar, click the PDF icon and choose “Export all images as PDF” or “Export selection as PDF”. The PDF settings open.
-
Set up the document
Enter a document title and optionally the author, choose portrait or landscape and decide whether file names appear below the images and whether the file size should be optimized.
-
Design the front page and comment pages
Enable “Design Custom Front Page” and click “Design Front Page”. For extra pages, enable “Add Comment Page” and open “Design Comment Page”. “Save” keeps your layout.
-
Export
“Start Export” creates the PDF right in your browser and saves it to your computer.
Design the front page freely
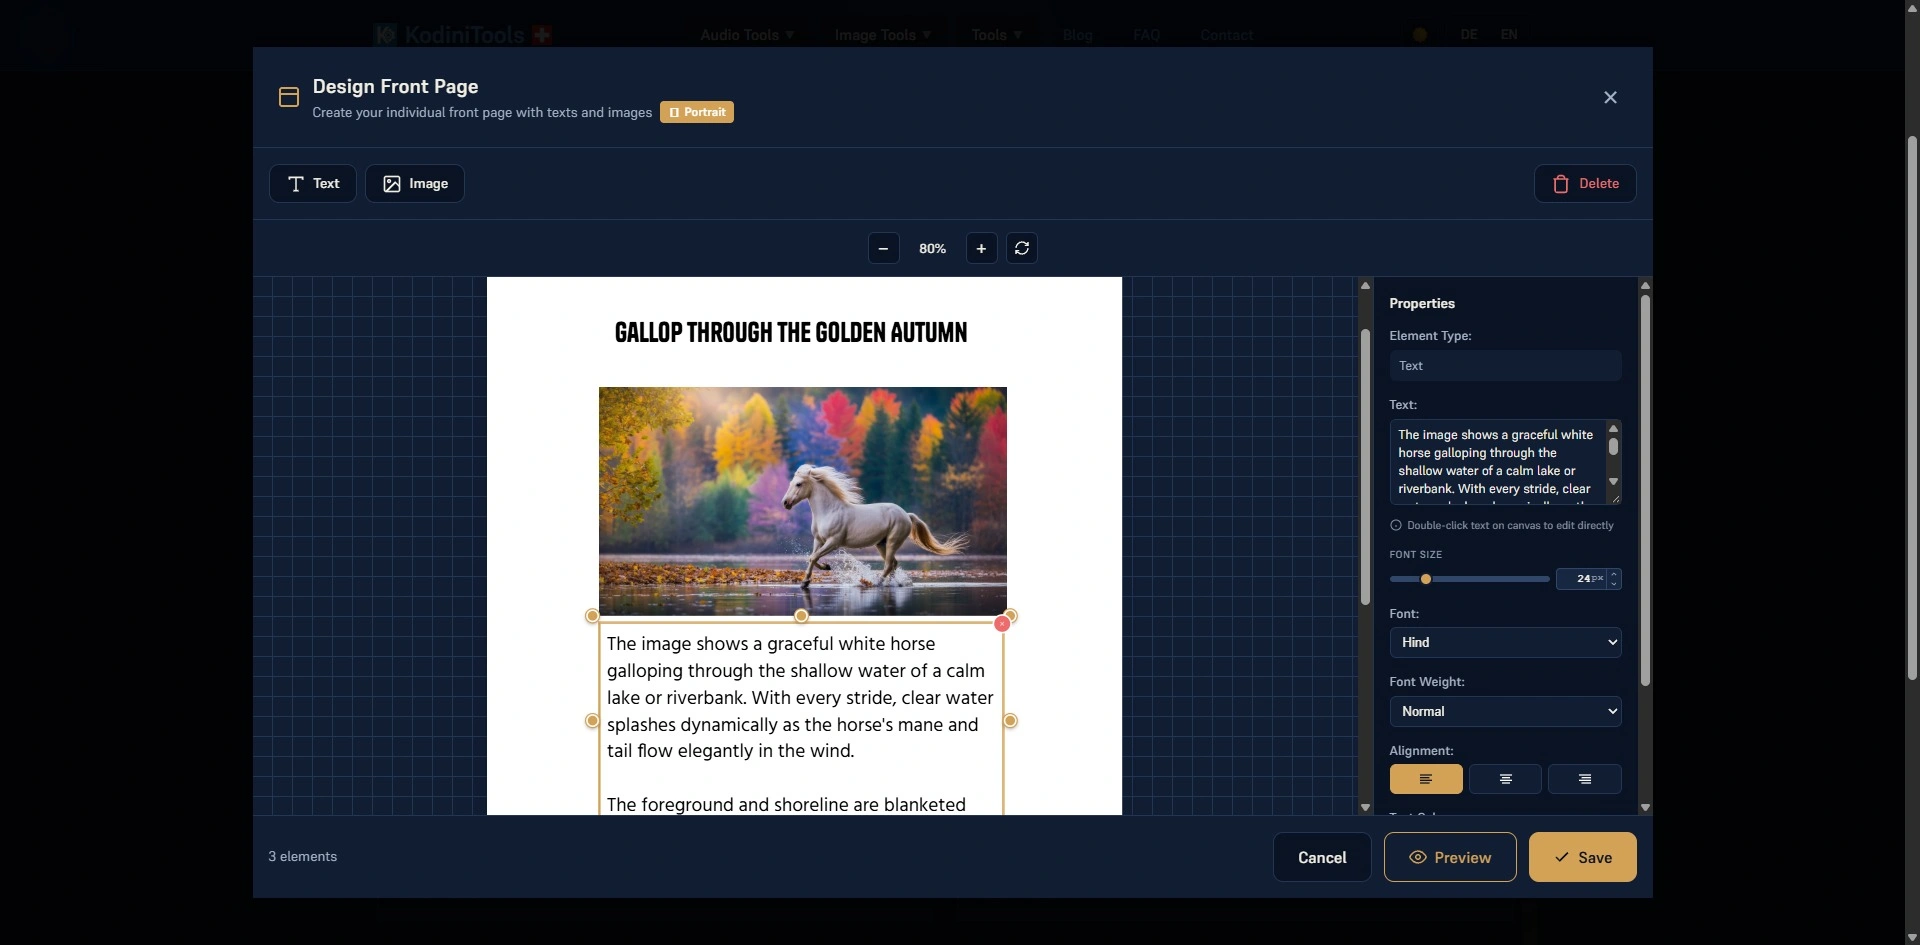
The designer shows an A4 page in the chosen orientation. With “Text” and “Image” you add new elements, drag them to the right spot with the mouse and resize them with the handles. Double-click a text to edit it directly on the page. On the right, under “Properties”, you fine-tune the selected element:
- Font: 14 fonts, including Helvetica, Clash Display, General Sans, Hind, Satoshi, Tanker and Zodiak.
- Font size: 12 to 72 px via slider or number field.
- Font weight and alignment: normal or bold, left, centered or right.
- Text color: any color, for example to match your logo.
- Images: upload a logo, cover photo or signature and set its size and position to the pixel.
Above the page you can zoom in, zoom out and reset the view. “Preview” shows the finished front page without frames and handles. Once you have designed a custom front page, it replaces the automatic title page.
Comment pages for notes and descriptions
The comment page designer works like the front page designer but manages several pages. “New Page” adds more pages, and you can flip between them. It also offers italic text, opacity for every element and the “Front” and “Back” layers to place text on top of images. Every comment page gets a footer with the creation date and page number.
The finished PDF always follows the same order: first the front page or title page, then the comment pages, then one image per page.
Tip for small PDFs: Enable “Optimize File Size” if the PDF is going out by email. The images are then compressed more strongly as JPEG (quality 65 instead of 75 %). On screen the difference is barely visible, but the file gets smaller. Independently of this, the export scales every image to at most 1920 px on the longest side.
Typical use cases
- Photographers: Send a selection from a shoot to clients as a PDF with a title page and logo.
- Applications and portfolios: Combine work samples with a designed front page and descriptions on comment pages.
- Trades and construction: File photos of an inspection or damage report together with notes as one document.
- Real estate: Send property photos with a cover image and short description as a simple brochure.
- Personal: Turn vacation photos or a photo album into a PDF for family and friends.
Privacy first
The PDF is created entirely in your browser. Images, texts and logos are processed locally on your device and are not uploaded to a server. Confidential material such as client photos or damage reports stays with you.
Create a PDF from your images now — with a custom front page and comment pages, free in your browser.
Open the image series editor →