Record Audio in the Equalizer: Recording Source, Settings & Download in the 19-Band EQ Pro
Dialing in the equalizer and compressor is one half of the job; keeping the result as a file is the other. That is why the KodiniTools 19-Band EQ Pro does not record the original file but the fully processed signal: whatever you hear ends up in the recording exactly like that. The source can be the playlist, a microphone, a line-in or your PC's own sound. This guide shows how to choose the recording source, which settings are available and how the download works.
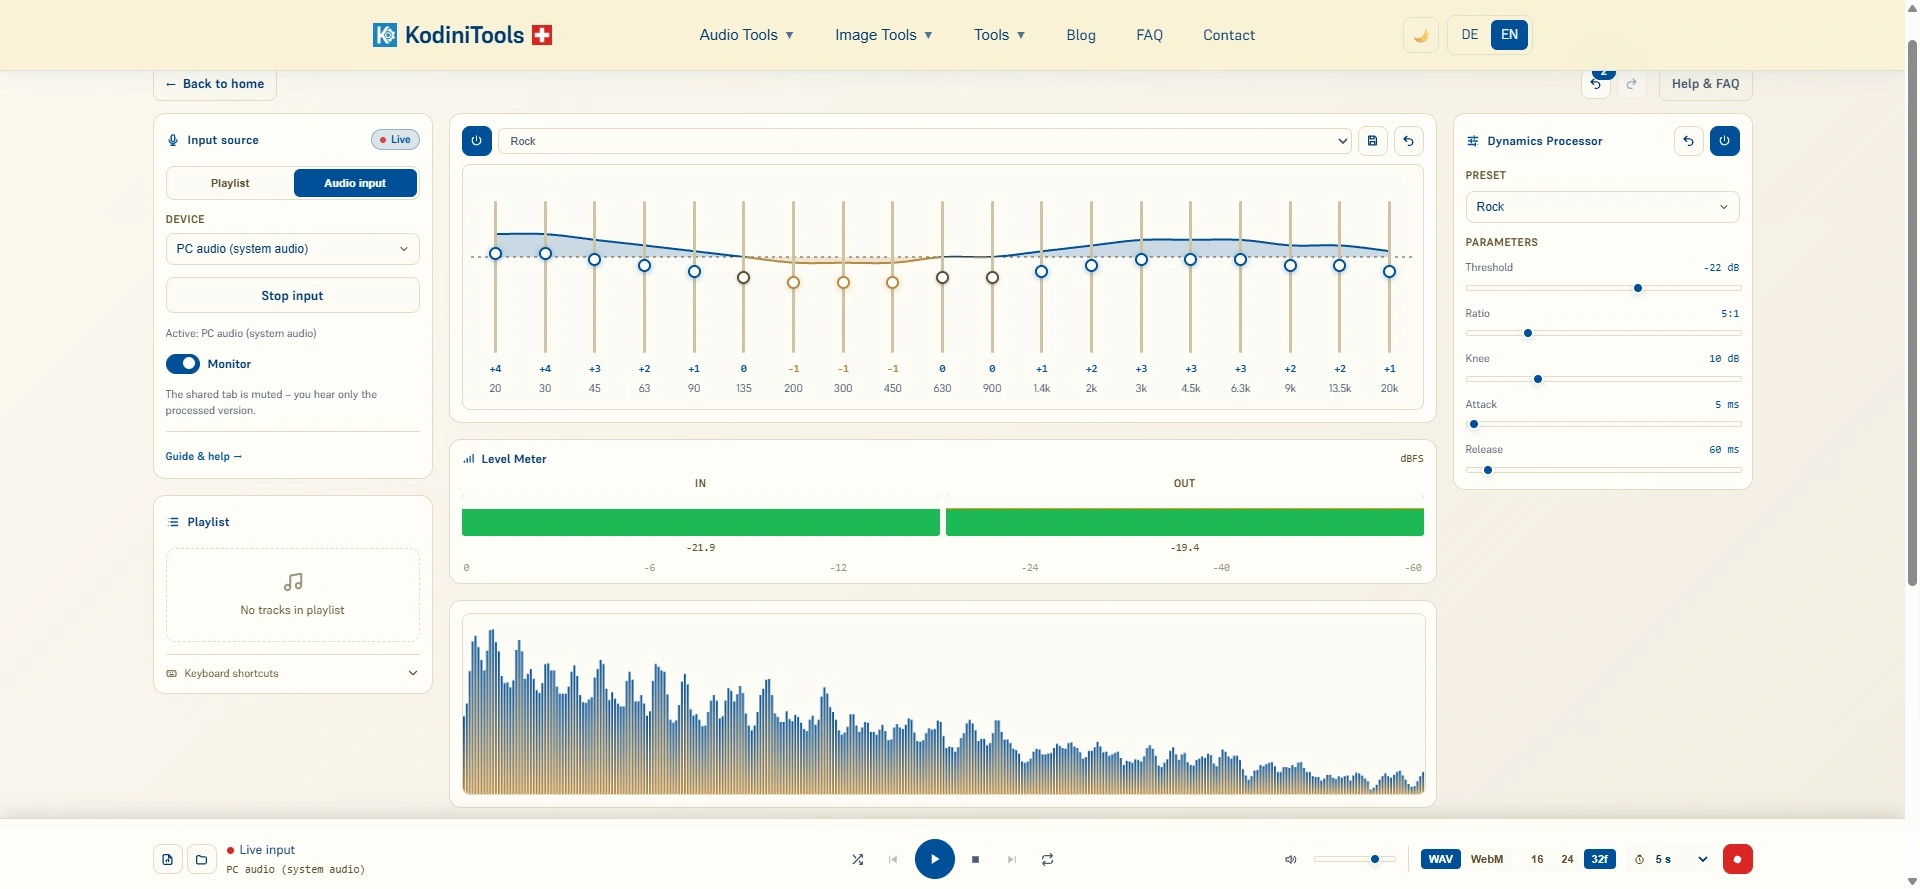
What Exactly Gets Recorded
The recorder sits at the end of the processing chain, right behind the equalizer and compressor. So the recording always contains the processed signal, never the raw source. Two practical consequences: whatever you change on the equalizer or compressor while recording is captured from that moment on. And the recording keeps running undisturbed if you bypass the compressor in between, pick a different input device or switch from the playlist to the audio input.
Recording does not stop automatically at the end of a track; it runs until you click stop. Gaps between two tracks are recorded as silence. A red time display in the player bar counts the recording time in minutes and seconds.
Choosing the Recording Source: Playlist or Audio Input
The “Input source” card at the top left decides which signal runs through equalizer, compressor and recorder. Two modes are available:
| Source | What is recorded | Typical use |
|---|---|---|
| Playlist | The loaded audio files, exactly as the player plays them | Shape existing tracks and save them as a new file |
| Audio input: microphone, line-in, audio interface | The live signal of the selected recording device | Record speech, instruments or a turntable straight through EQ and compressor |
| Audio input: Stereo Mix or virtual audio cable | The computer's playback as an input signal | Process any application when screen sharing is not an option |
| Audio input: PC audio (system audio) | The sound of a browser tab or the entire screen, via the browser's share dialog | Send YouTube, Spotify or online radio live through the equalizer and capture it |
Playlist
In the default mode the files in the playlist supply the signal. Load single tracks or whole folders by click or drag & drop, start playback, and the recording captures the running track. Several tracks in a row end up in one continuous file.
Audio Input
The “Audio input” switch changes to a live signal. The “Device” dropdown lists every recording device your system offers to the browser: the system default input, microphones, line-in, audio interfaces or Stereo Mix. After “Start input” the browser asks for permission once; the device names appear after that. The app remembers your choice for the next visit. The equalizer deliberately switches off the browser's voice filters (echo and noise suppression, automatic gain) so music stays unaltered, and records in stereo wherever possible.
Under “PC playback” there is the additional entry “PC audio (system audio)”. Since browsers cannot open output devices, this path goes through the screen-sharing dialog: choose “Entire screen” there and tick “Share system audio”. The app only uses the sound; the picture is discarded immediately. This works in Chrome and Edge on Windows; on macOS and Linux usually only the sound of a single tab can be shared. If you share a browser tab, the browser mutes that tab's original sound and you hear only the processed version, while the app stays in front.
Monitor: the “Monitor” switch sends the processed signal to your speakers. With a microphone or Stereo Mix it is off by default, because the sound would otherwise be captured again and cause feedback. Only enable it there with headphones. Recording and level meter work independently of it, even without monitoring.
Settings: Format, Bit Depth and Start Delay
All recording settings live in the player bar at the bottom of the screen, to the right of the volume control. As long as no recording is running you see the format toggle there, the bit depth for WAV, and the timer icon for the start delay.
WAV or WebM
WAV is uncompressed and lossless. The equalizer taps the samples right behind the processing chain and writes them to the file without any lossy intermediate step, at the sample rate of your audio system, usually 44.1 or 48 kHz. The price is file size: one minute of stereo at 44.1 kHz takes about 10 MB at 16-bit and about 16 MB at 24-bit. WebM uses the Opus codec and produces much smaller files at very good quality, ideal for voice recordings or quick sharing. If you need MP3, FLAC or AAC in the end, convert the WAV file afterwards with the Audio Converter.
WAV Bit Depth
| Setting | Format | When to use |
|---|---|---|
| 16 | 16-bit PCM, CD quality | Standard for finished tracks, smallest WAV file, plays everywhere |
| 24 | 24-bit PCM, studio quality | Material that will be edited further, more headroom in quiet passages |
| 32f | 32-bit float, lossless | Exact copy of the internal processing; levels above 0 dBFS are not clipped but preserved |
The bit depth can still be changed after recording, as long as you have not saved the file yet: the equalizer keeps the take internally as floating-point values and converts it to the chosen depth only when saving. Your choice is remembered for future recordings.
Start Delay
Via the timer icon you choose whether recording starts instantly or after 3, 5 or 10 seconds. After clicking the record button, a large countdown runs in the middle of the screen. The app stays usable, so you can calmly start playback or reach for the microphone. Cancel with the button, a click on the seconds display in the bar or the Esc key. This setting is remembered too.
Step by Step: From Signal to File
- Open the 19-Band EQ Pro
Go to kodinitools.com/equaliser19 — free, no registration.
- Set the recording source
Either load tracks into the playlist, or switch to “Audio input” in the “Input source” card, pick a device and click “Start input”. The live badge in the card and the “Live input” entry in the player bar show that the signal is present.
- Shape the sound
Choose a preset, fine-tune the bands and enable the compressor if needed. The level meter shows input and output in dBFS; keep the output below 0 dBFS so the recording does not clip.
- Choose format and delay
Click WAV or WebM in the player bar, set the bit depth for WAV, and pick the start delay via the timer icon.
- Start recording
Click the red record button. If a countdown is running, recording begins at zero. With the playlist, start playback now; the time display counts the duration.
- Stop and download
End with the stop button. The green download button and “New recording” then appear. Download opens the “Download recording” dialog with the file name field; the .wav or .webm extension is added automatically.
- Save
In Chrome and Edge on desktop, “Save” opens the system dialog where you choose the target folder. Other browsers put the file into the default download folder. After saving, the record button is free again for the next take.
Tip: if you cancel the system dialog, the recording is kept and you can start the download again. Only “New recording” discards the take. That is also the way to go if you want to switch the format after a recording.
Typical Use Cases
- Polishing a podcast episode: file into the playlist, Podcast preset, compressor Vocal, record as 16-bit WAV and save it as the final version.
- Digitizing vinyl or cassette: line-in as the input, cut rumble below 45 Hz, 24-bit WAV for later editing.
- Capturing online radio or a stream: PC audio as the input, share the screen with system audio, equalizer to taste, WebM for small files.
- Voice recording with countdown: microphone as the input, monitoring off, 5 seconds delay so the mouse click does not end up in the recording.
If Something Does Not Work
- The recording is empty or silent: with the playlist a track has to be playing, with the audio input the input has to be started. The level meter shows whether a signal is present.
- It whistles or echoes: feedback from monitoring with a microphone or Stereo Mix over speakers. Switch monitoring off or use headphones.
- No sound arrives with PC audio: “Share system audio” was not ticked in the share dialog, or a window was chosen instead of the entire screen. Stop sharing and start again.
- The browser blocks the microphone: allow access in your operating system's privacy settings, then repeat “Start input”.
Privacy: The Recording Stays on Your Device
The recording is created entirely in your browser using the Web Audio API. Neither the source files nor the take are sent to a server; that also applies to microphone and system audio signals. The file exists only where you save it.
Record now — playlist, microphone or PC audio through the equalizer, saved as WAV or WebM.
Open 19-Band EQ Pro →